2 Elves 2 Furious: Grey Knights vs. Aeldari (again) Battle Report

Last time, I talked about playing against the Black Legion of Chaos Space Marines. Unfortunately, I wasn't able to attend the next week of the league, so I had to do a makeup game during the week. This meant that I was playing the same mission that I played against the Black Legion. It worked for me last week, so hopefully I would have the same luck this week?
Just as a reminder, this is the 1000 point list that I'm currently working with:
Warlord: Grand Master in Nemesis Dreadknight
Brotherhood Librarian
2x Nemesis Dreadknight
Strike Squad
Brotherhood Terminator Squad
Round 7: Grey Knights vs Aeldari (again)
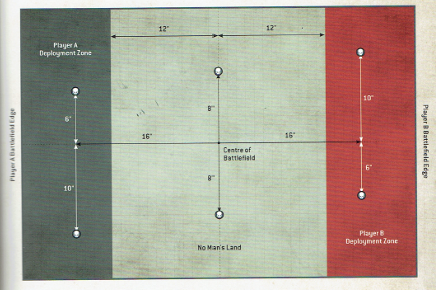
I didn't talk about the actual mission last time, mostly because it is pretty standard. Four points per round if you control at least 2 objectives, another 4 if you control at least 3 objectives, and 4 points if you control more objectives than your opponent. So the name of the game is to hold at least the objectives on your side of the board and try and fight over the middle points. Especially since there were bonus points given if your opponent controlled objectives in your deployment zone.

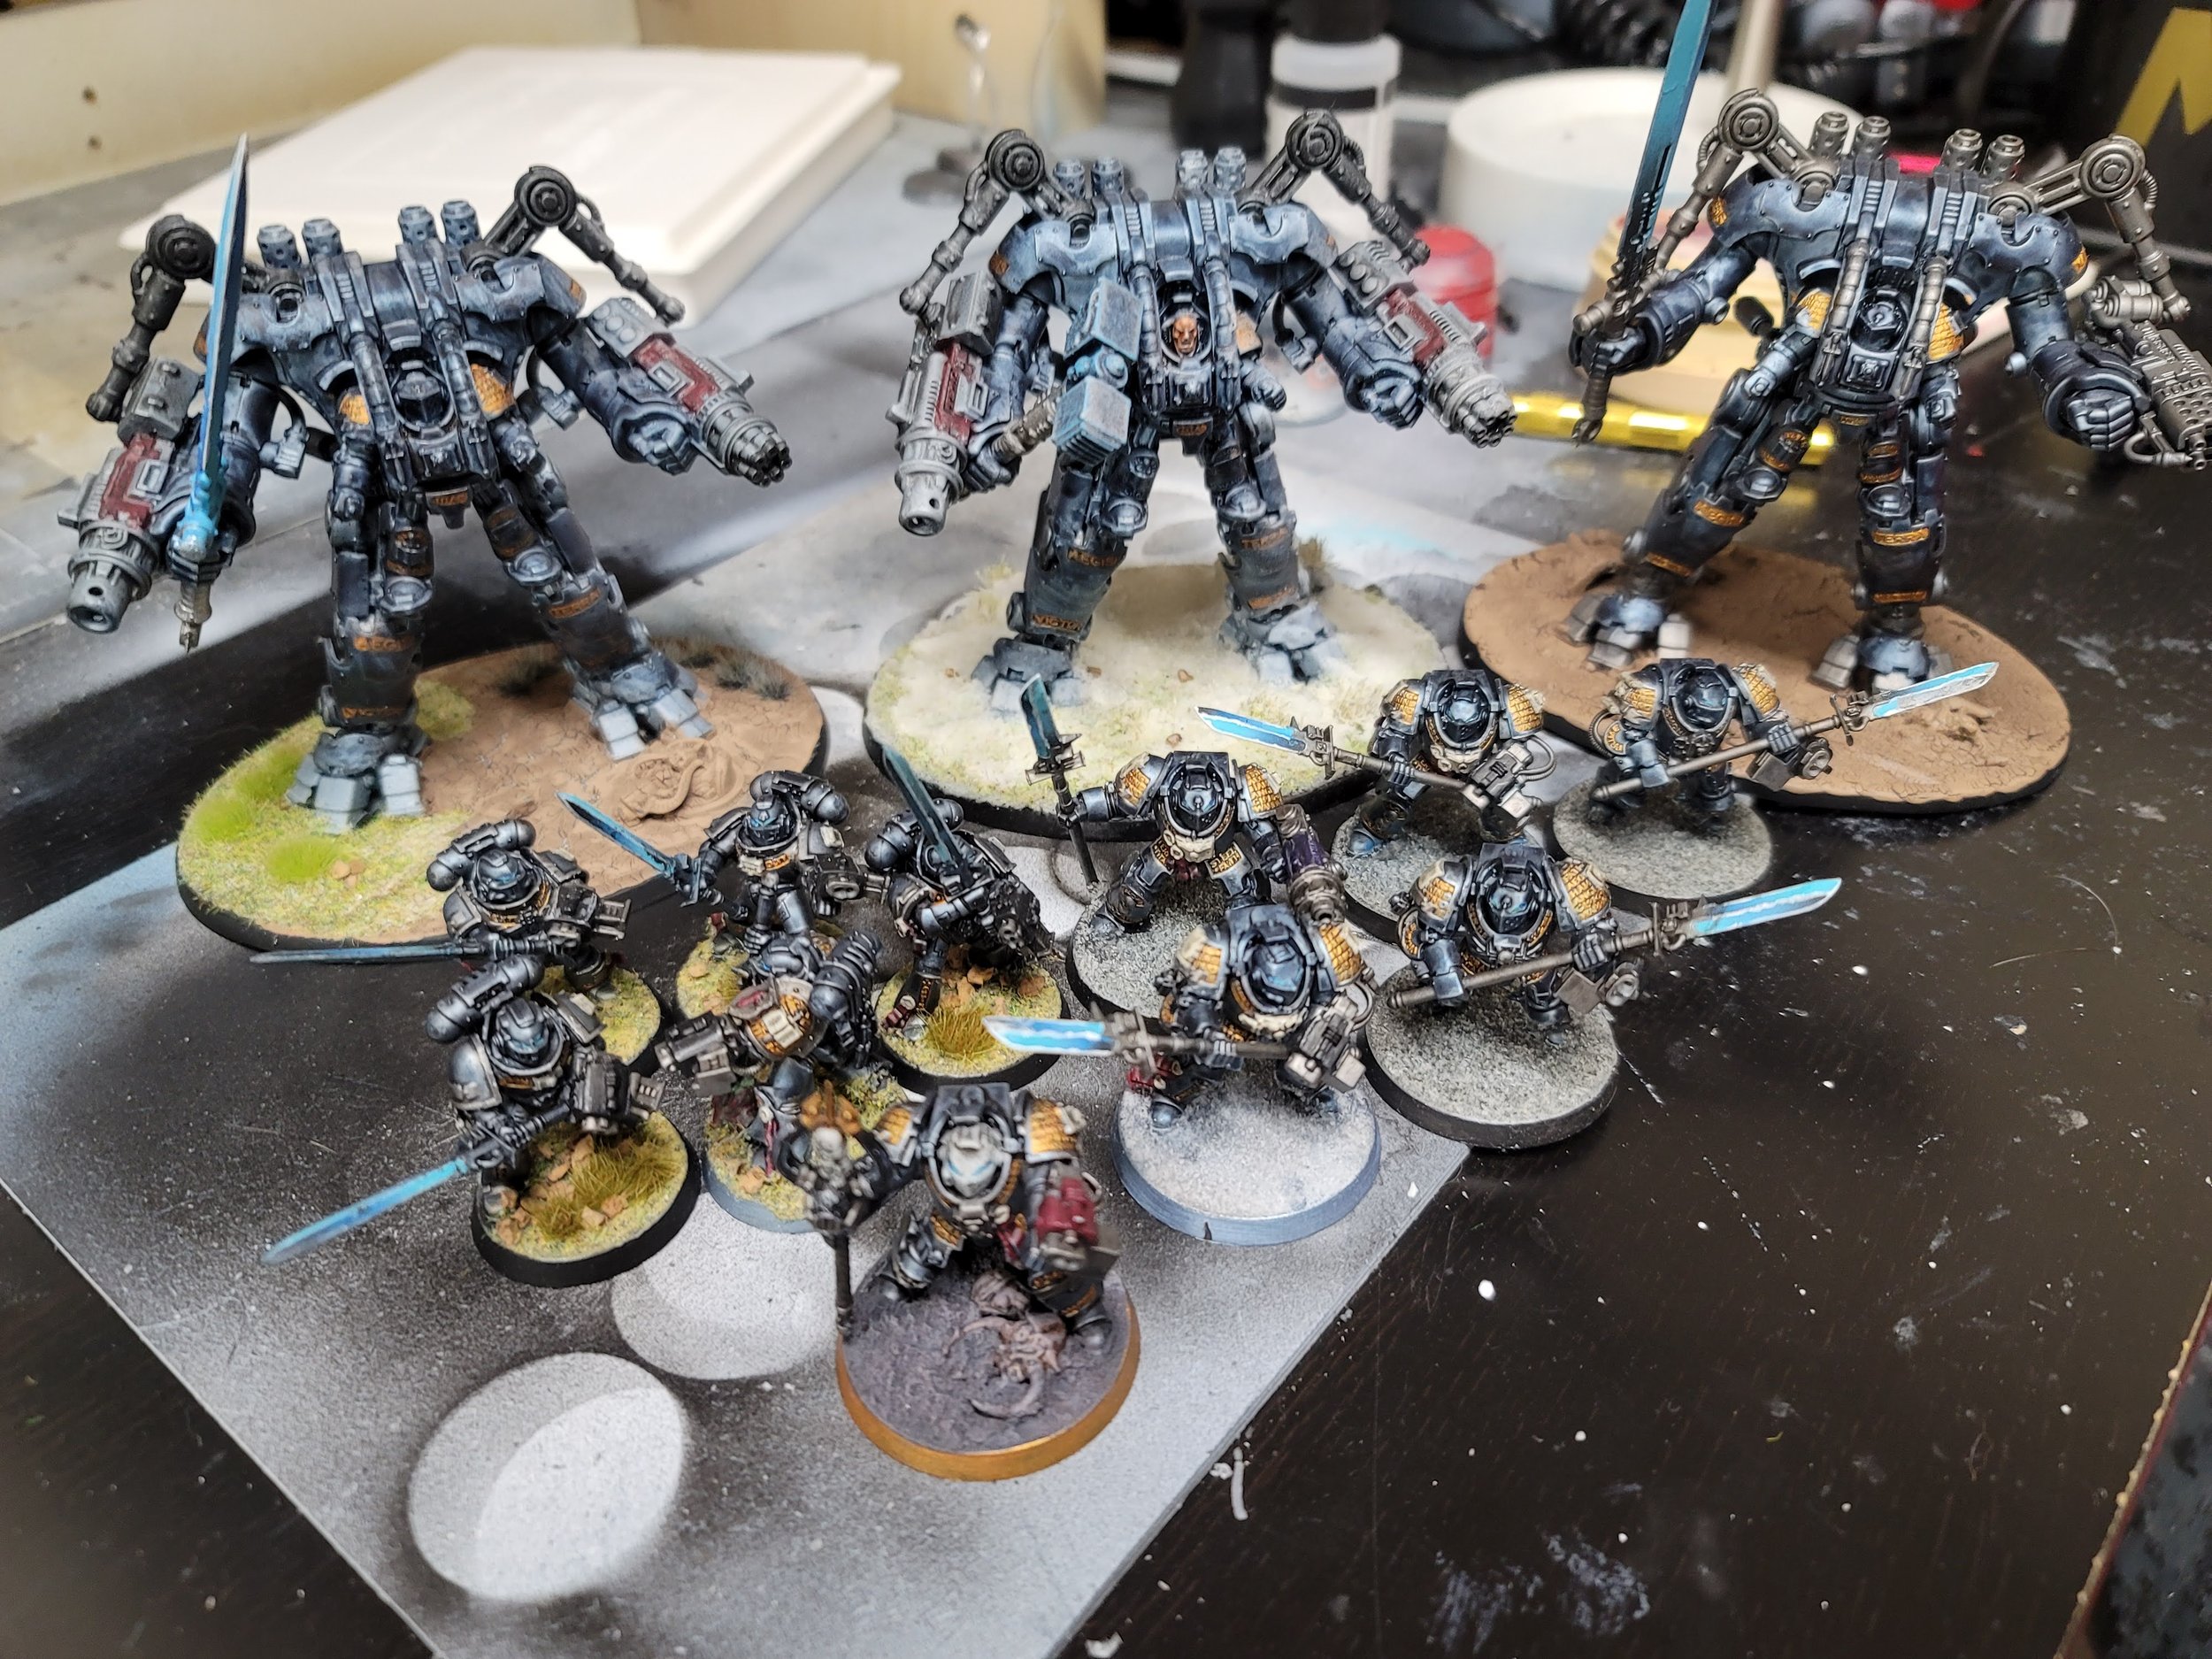
Speaking of deployment, I actually did learn something from last week's game. I made sure to put the Grand Master Dreadknight (white base in photo) in the front of the pack so he could get in first for charges. Then, I put the librarian on the objective to my right with the squad of Terminators, and then left the Strike Squad on the left. When I inevitably teleported/moved the Terminators, there would be people on both objectives to keep anyone from easily getting them.
What's it like to go first?

Continuing the streak of the past few games, I lost the dice roll and went second. Being the Aeldari, my opponent was able to quickly take his hover bike things and send them up all the way to my side of the board. Luckily for me, most of my more vulnerable units are hidden in cover. This leaves the three Dreadknights. Which also helps as a bit of psychological warfare as they tend to intimidate players. There have been many times where people will focus on the Dreadknights and allow me to move other units around in the meantime.
Hover Bike Things? What Hover Bike Things?

Being on the other side of the board meant that A) there wasn't much that could attack me other than those bikes and B) the bikes were a very pressing and immediate threat. So naturally everyone opened fire on the bikes in an attempt to finish them off. The hover bikes did manage to inflict some damage before dying though. Almost half of the strike squad got wiped out easily enough, and the Grand Master Dreadknight was smoking at this point. Apparently when you put your Warlord front and center….people tend to shoot at it first. Go figure!
During the fight with the bikes, I decided to sacrifice the back right objective so that I could get the Terminators and the Librarian up to the middle points. The Aeldari have some great saves against shooting, so getting those units up close for some mortal wounds in the Psychic phase helped pick them off. Plus, there was a nasty looking tank in the background that the Dreadknights were going to need some help with.
We've got an opening

In front of the tank was a group of warriors hiding behind some terrain. While the Grand Master was nearly dead, I was able to get off a few shots to clear out those troops. The Terminators and Librarians focused on the tank, dealing some hefty mortal wounds with psychic spells and getting in some hits with their Storm Bolters. Although things were looking positive, I also took the opportunity to teleport my Grand Master back to my side of the board. With few wounds remaining on the Grand Master, I wanted to keep him back to provide some extra defensive assistance to the Strike Squad.
Speaking of Dreadknights and teleporting, I had lost one of my Dreadknights to the remaining Aeldari, but I still had one with most of his wounds left. Now that the tank and units to the left were gone, I now had a wide open area to teleport the healthy Dreadknight too. With a successful charge roll, he was able to get right up on the point and onto the remaining Aeldari troops. It was at this point that my opponent conceded, as there was not much left he could do to try and score points. Woohoo! Another win for me! That makes me 3-4 overall!
What did I learn?
The strategy I tried to implement last time but managed to do this time can be effective after all
Keeping open the option to teleport units *back* to my side of the board to keep them alive is a pretty good idea as well.
Dreadknights are nasty. Man am I glad I'm not going to have to go up against them anytime soon…
Do you have fancy objective markers like the neoprene pads in the photos above? What do you use? Let me know in the comments, or on Twitter/Facebook.